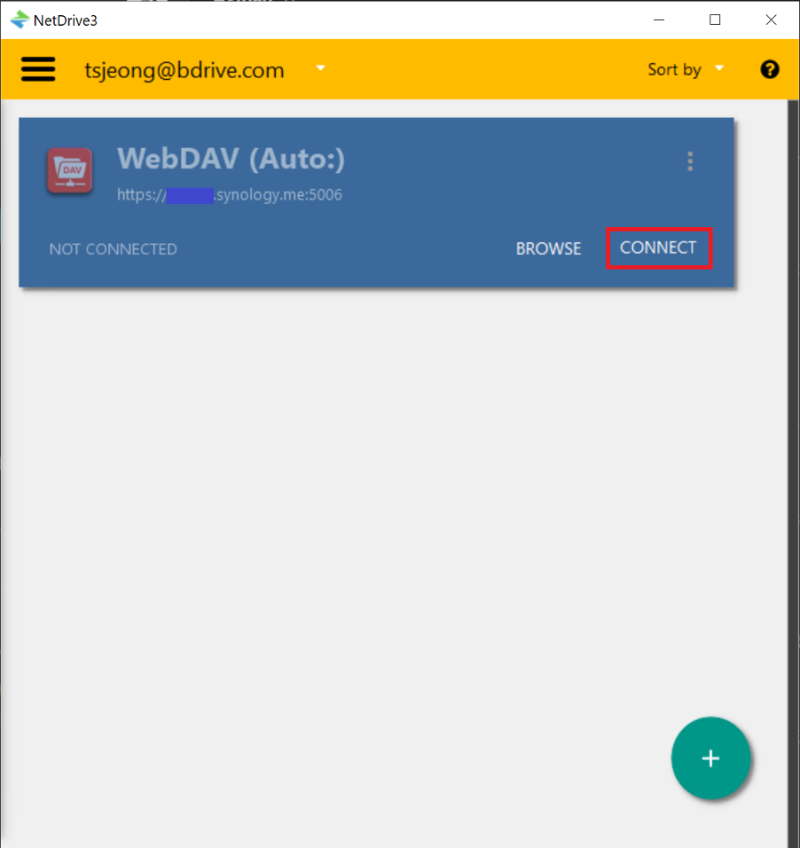
Access the cloud storage as if it were a local disk.
- Performance and stability
We provide industry validated performance and stability.
- Over 2 million users worldwide
Since 2010, NetDrive has been trusted by over 2 million users worldwide.
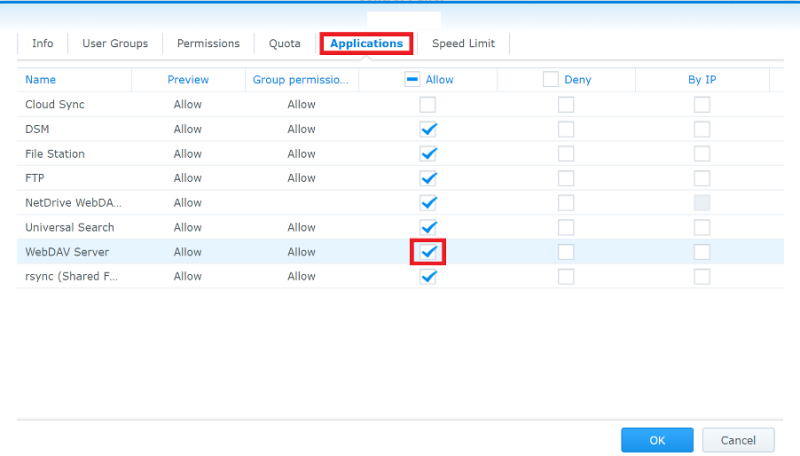
- File lock for all files
When editing a file, other users can only open the file in read-only mode until you complete the file editing. Don't worry about your files being overwritten by other users.
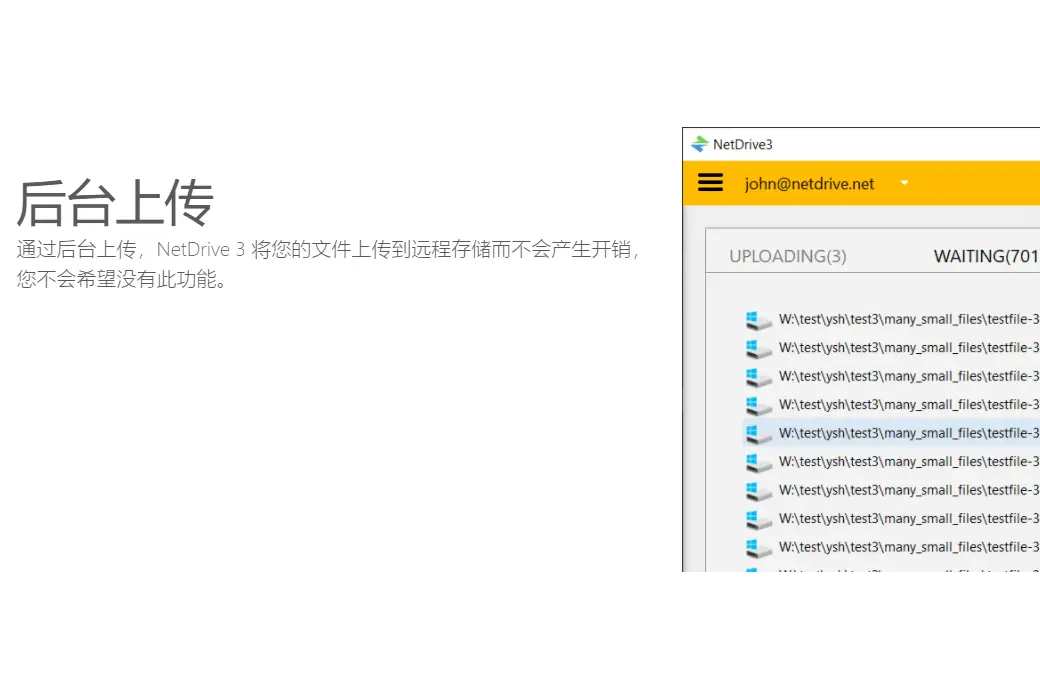
- Upload in the background
Open the backend upload, and your file will be uploaded using the backend process. If you have many small files to upload, this feature will save you a lot of time.
- Manage your team
Through team planning, you can manage team licenses. You can easily assign NetDrive licenses to your team members. The team plan also provides team drivers to share the same remote storage for all members. File locking also applies to team drives.
Use remote storage as a local disk
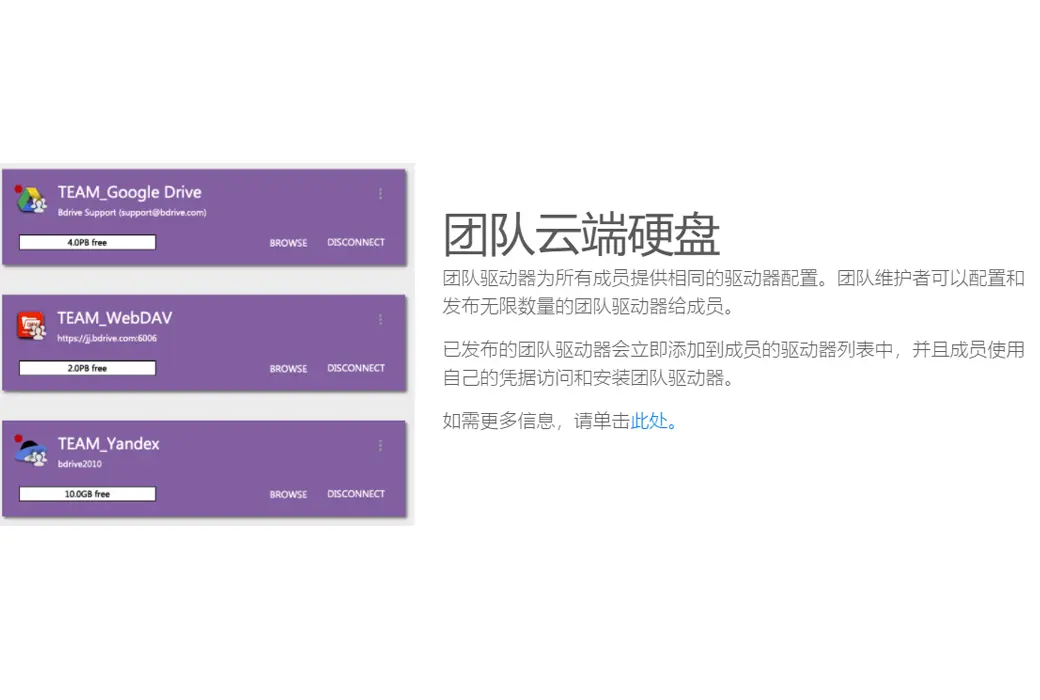
Team Driver
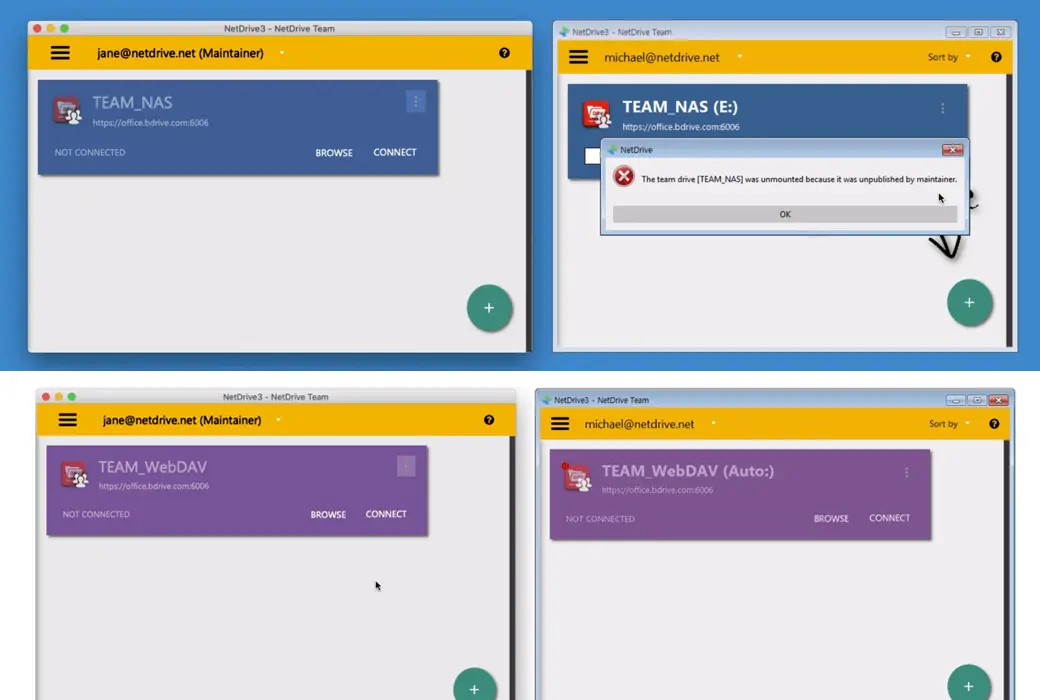
The team driver provides the same driver configuration for all members. Team maintainers can configure an unlimited number of team drivers and publish them to members.
The published team drive is immediately added to the members' drive list, and members use their own credentials to access and load the team drive.
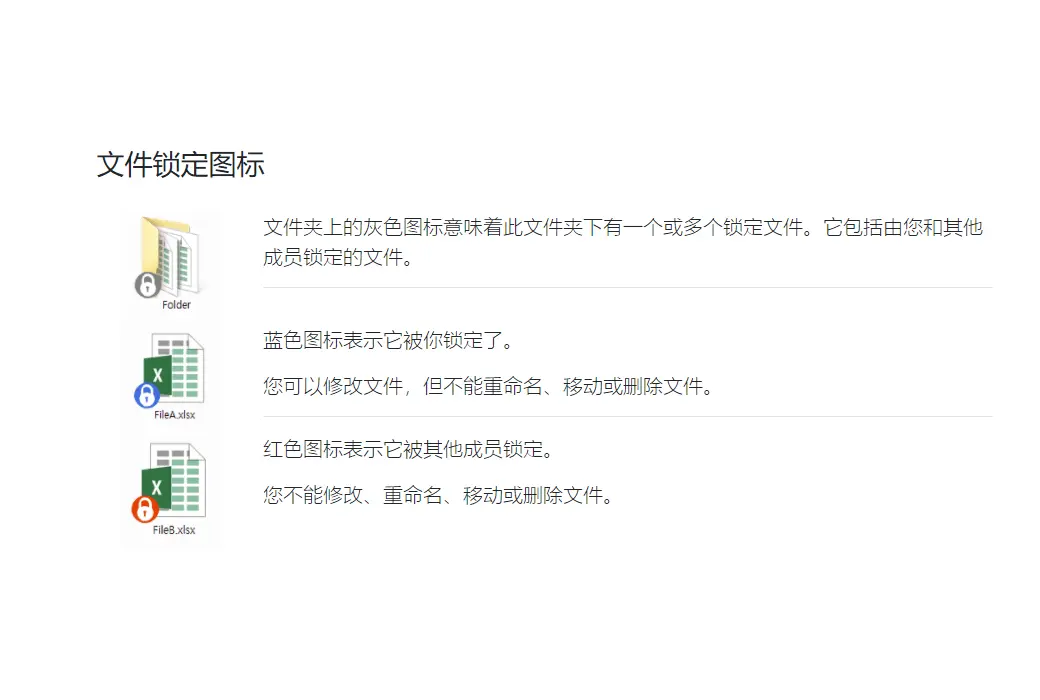
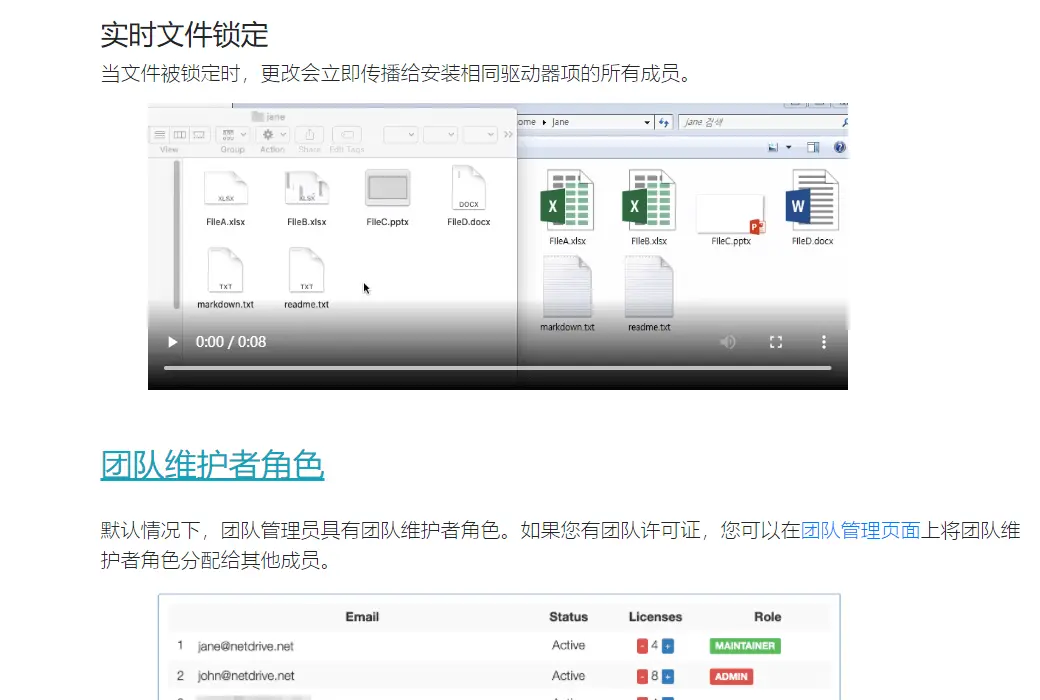
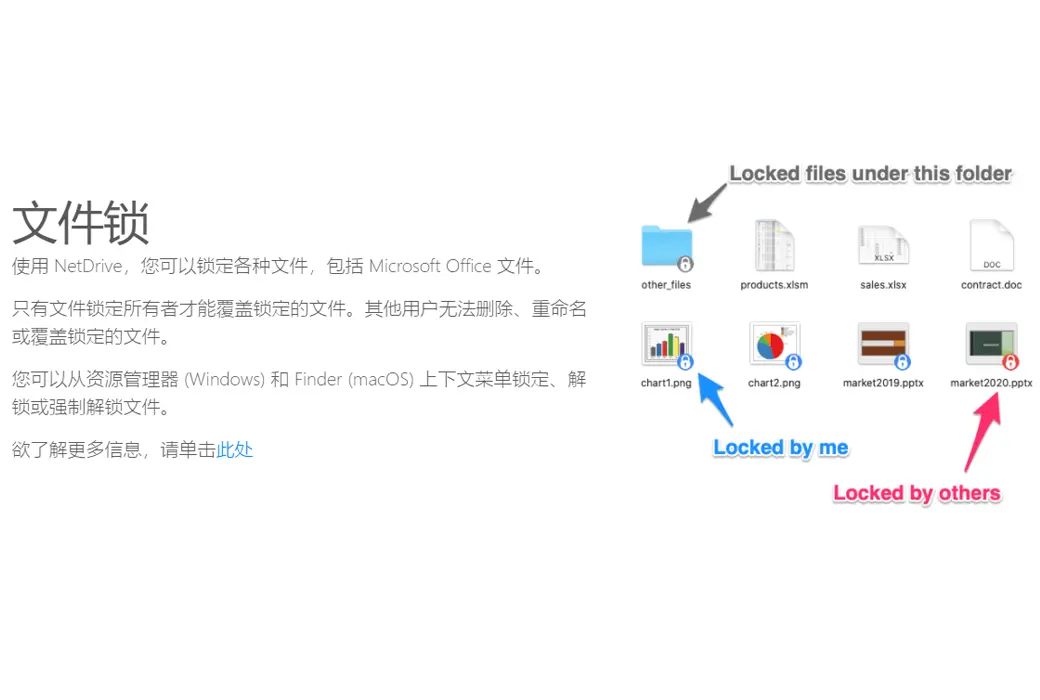
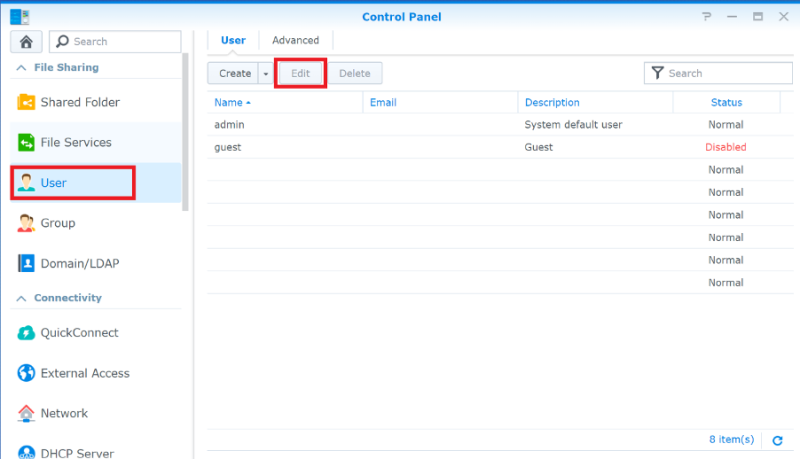
file locking
With NetDrive, you can lock all types of files, including Microsoft Office files.
Only the file lock owner can overwrite the locked file. Other users are unable to delete, rename, or overwrite locked files.
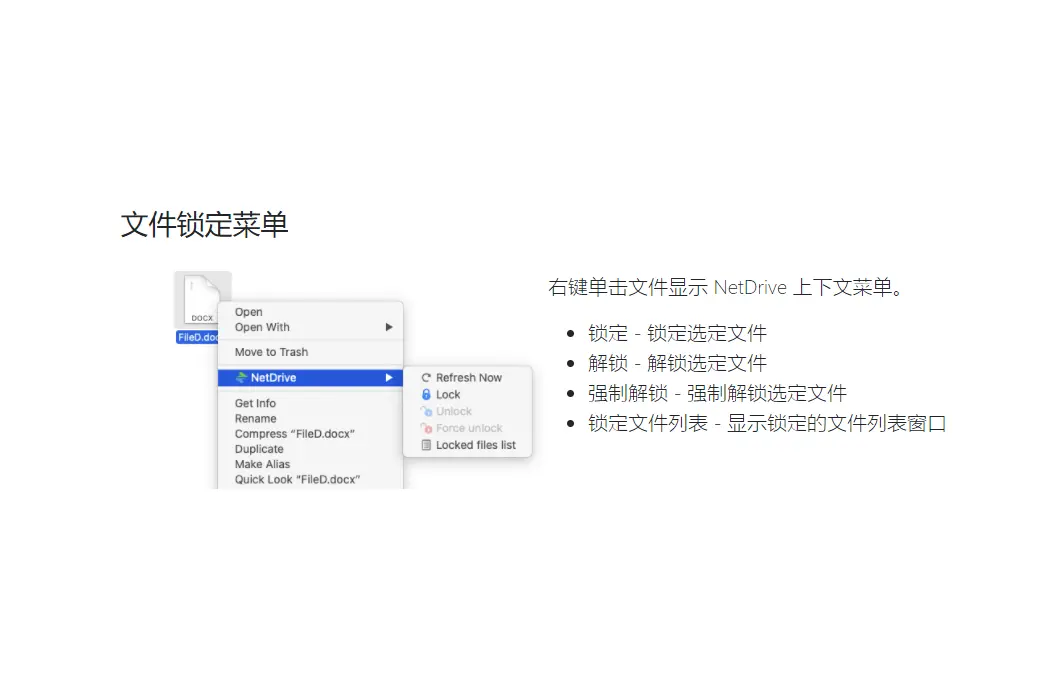
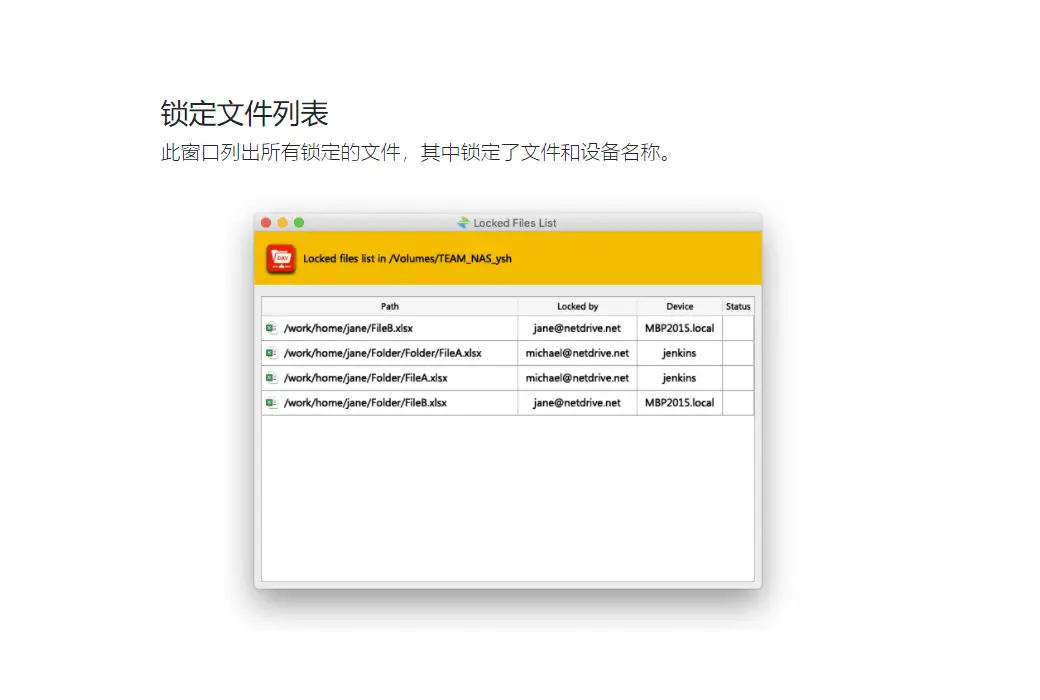
You can lock, unlock, or force unlock files in the context menus of Explorer (Windows) and Finder (macOS).
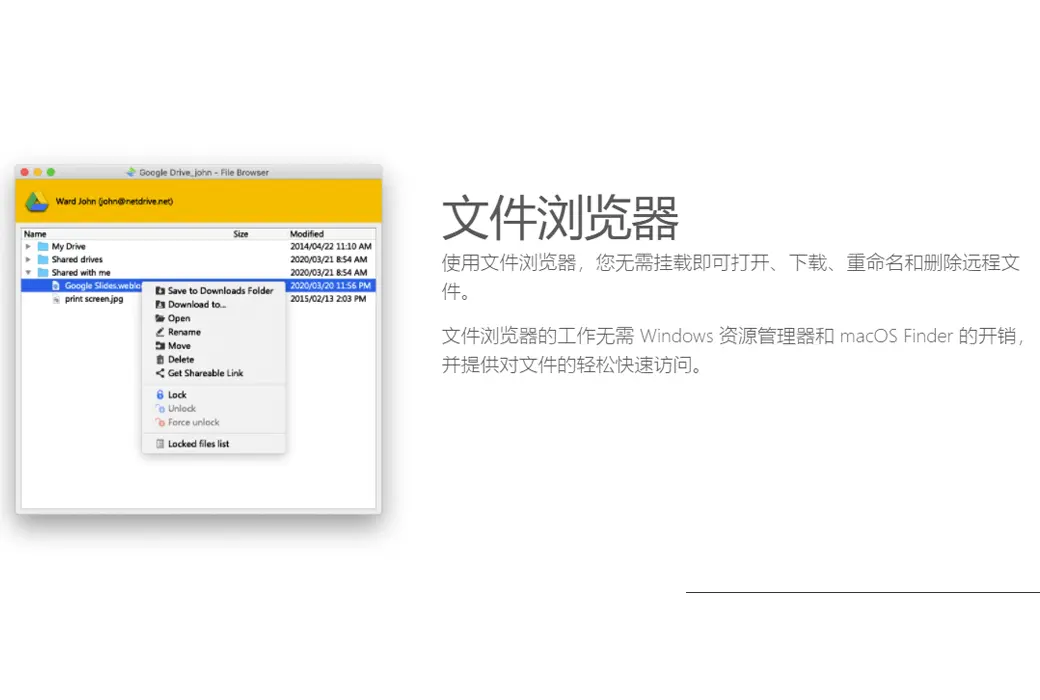
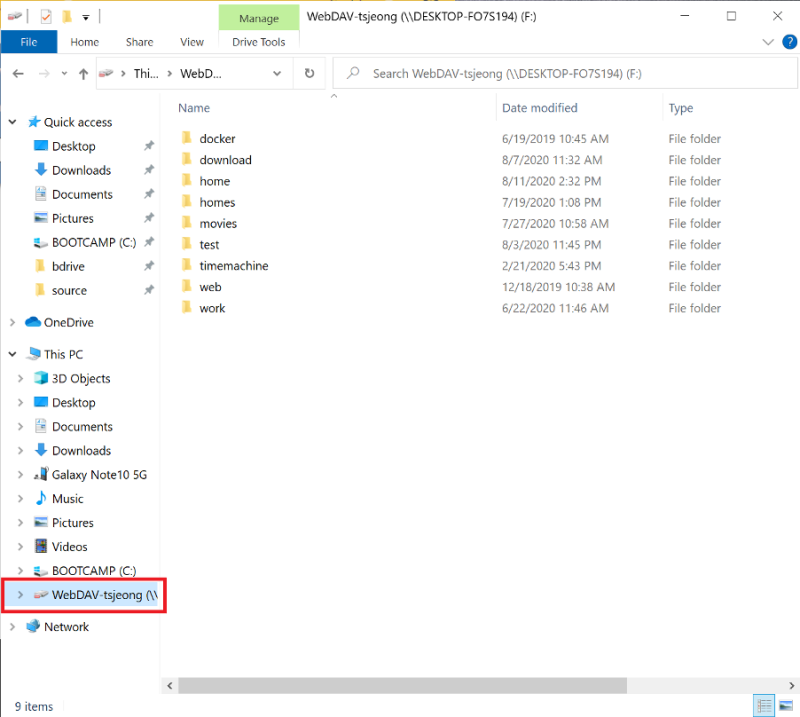
File Browser
Using a file browser, you can open, download, rename, and delete remote files without loading them.
The file browser eliminates the overhead of Windows Explorer and macOS Finder, and provides easy and fast file access.
Access remote files as local files.
You can access remote files using Windows Explorer, macOS Finder, and all software, just like accessing a local disk.
Upload in the background
By uploading through the backend, NetDrive 3 uploads files to remote storage without incurring any expenses, so you don't want to survive without this feature.
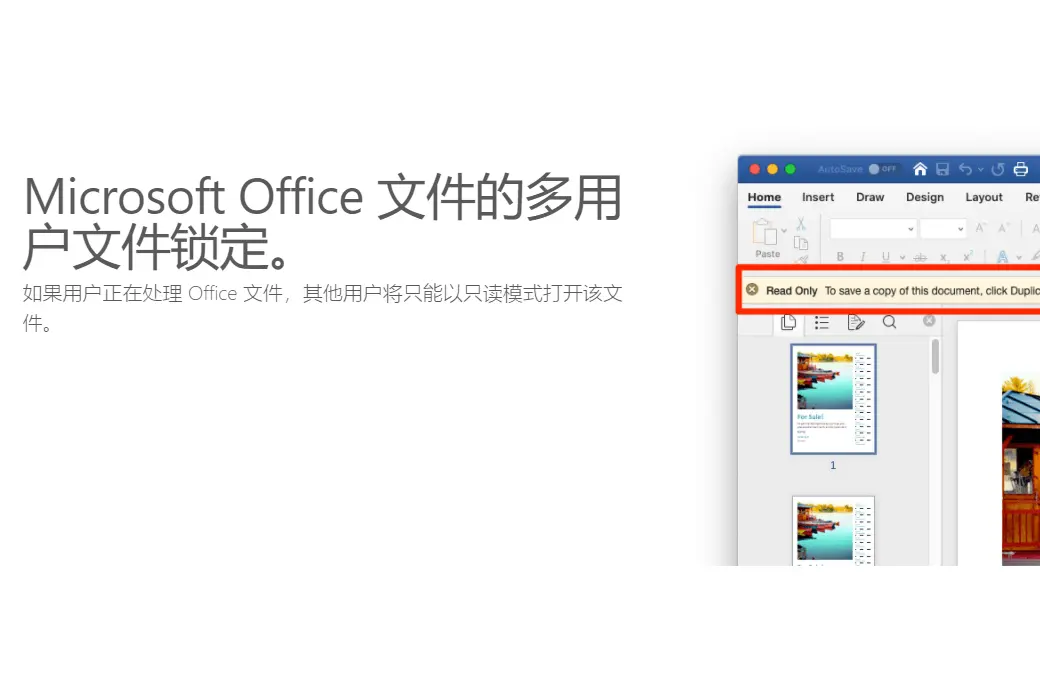
Multi user file locking for Microsoft Office files
If a user is working on an Office file, other users can only open the file in read-only mode.
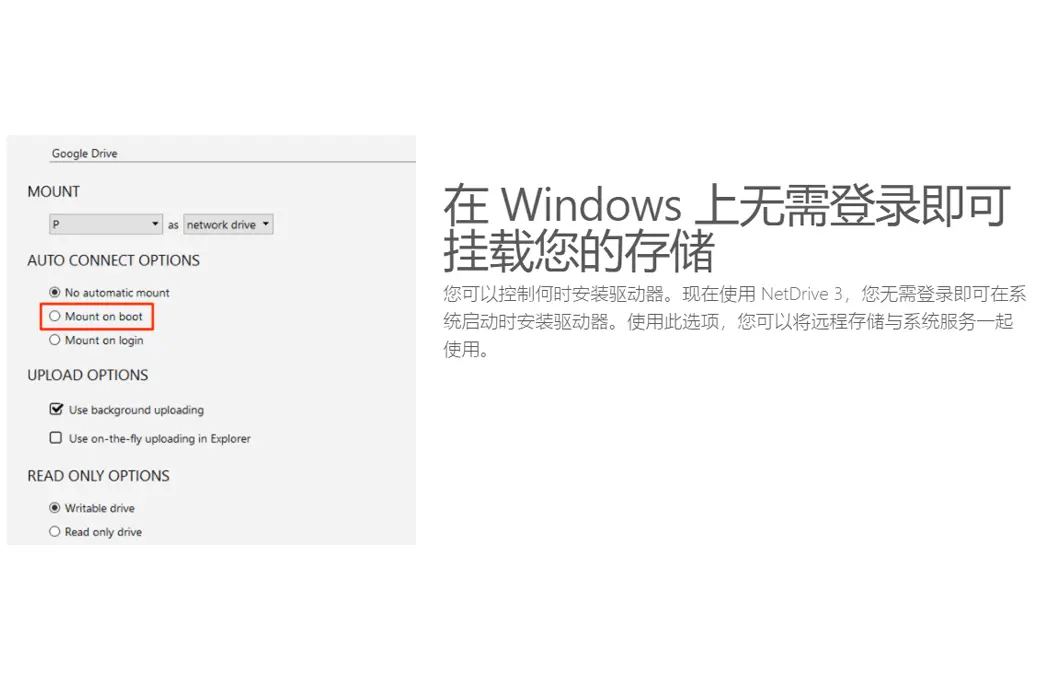
Automatically install storage after Windows starts.
You can control when to install the driver. With NetDrive 3, you can install the drive at system startup time without logging in. With this option, you can use remote storage together with system services.
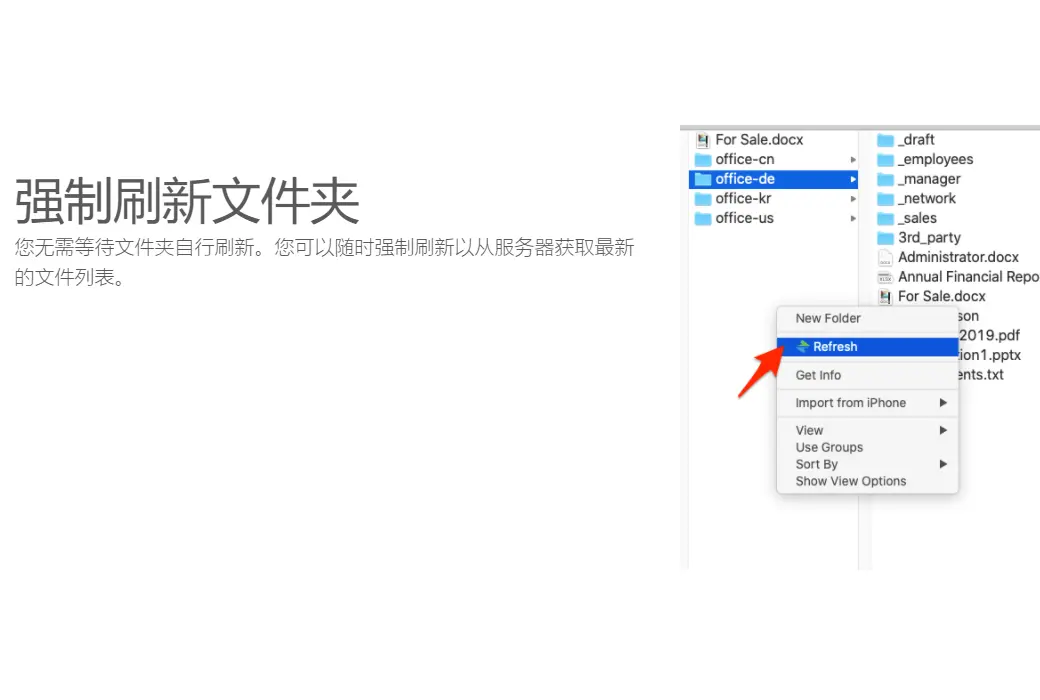
Force refreshing folder
You don't need to wait for the folder to refresh on its own. You can force a refresh at any time to obtain the latest file list from the server.
 NetDrive 3 Network Disk Management Remote Storage Tool Software